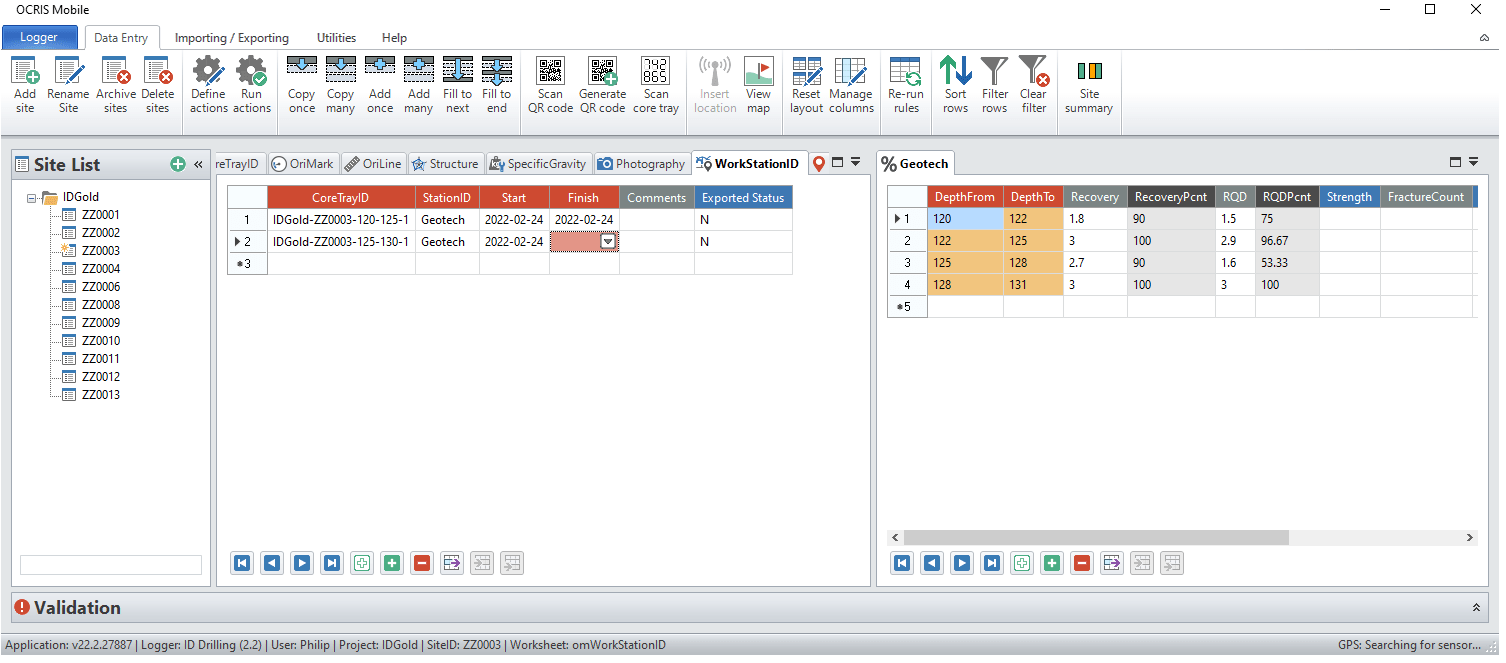
Data Entry
This section contains the old content from a previous iteration of the OCRIS Mobile documentation. It will be preserved here until the new content is 100% complete.
Select Worksheet
After selecting a Site to add data to, you will need to select the Worksheet you want to use. Each OCRIS Mobile implementation will be different based on your company requirements and the type of work being done. However, the way you select a worksheet and do the data entry remains the same.
To select the worksheet simply click on the Tab at the top of the worksheet or click on the Drop Down symbol at the right hand side of the frame and select from the list.
Numeric Data Entry
Cells containing numeric values can be populated by typing directly from a keyboard or you can use the Pop-up Numeric pad if this has been set in the Settings form.
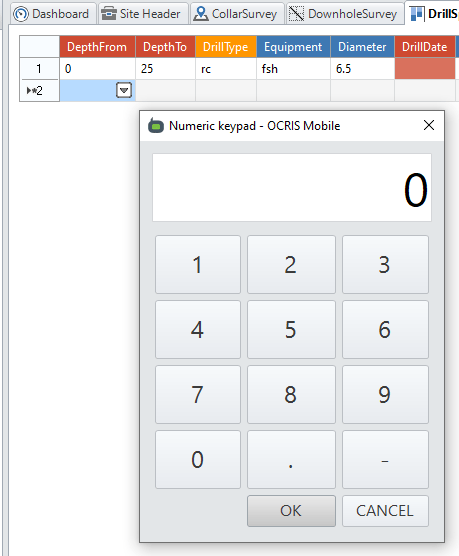
In either case, if you start typing when the cell is highlighted in BLUE the cell will be populated.
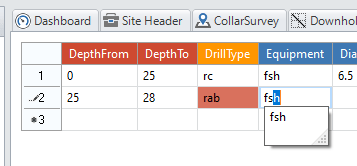
Text Field Data Entry
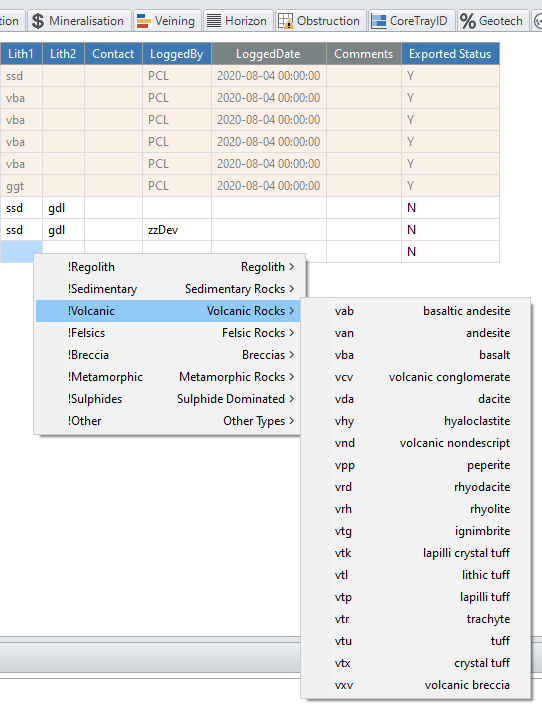
Text data is entered into cells by typing or selecting codes from Picklists. To enter data, select the required cell and either click on the down arrow on the right of the cell or start typing the code. OCRIS Mobile will pre-filter the available codes as you type, either click on the correct one when it appears or keep typing until complete and then move to the next cell.
OCRIS Mobile supports cascading lookup codes to group like attributes.
OCRIS Mobile supports long comments in worksheets. By default you type directly into the Comments field and the cursor will keep moving to the right as you type.
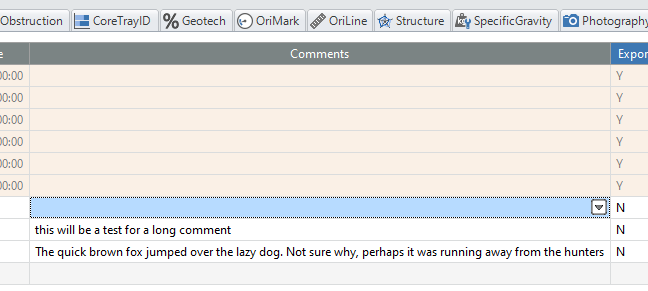
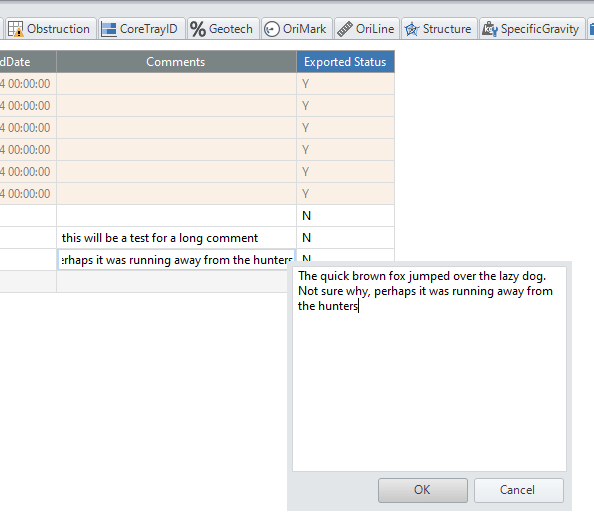
Alternatively, click on the down arrow on the right of the cell to open a box into which you type and can see the entire text string.
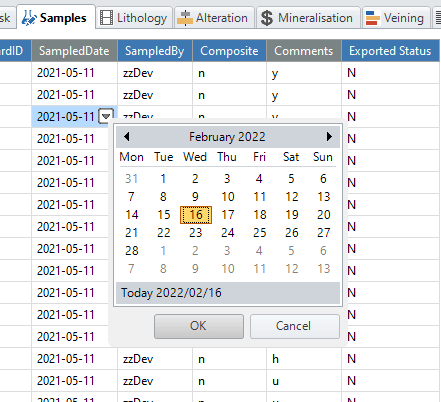
OCRIS Mobile supports a calendar picker on date fields. The date format show in the worksheet is set during the configuration process. To initialise the calendar click on the down arrow on the right side of the cell. Select the desired date and click OK.
Photographs and Other Images
Photography
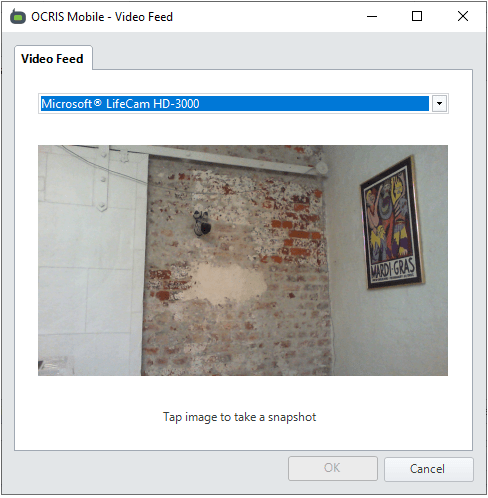
OCRIS Mobile supports photography from either an onboard Webcam or an attached DSLR. If using a DSLR you must first install DigiCamControl available at http://digicamcontrol.com/ (opens in a new tab).
To initalise the camera interface click on the down arrow on the ride side of the cell that will contain the image.
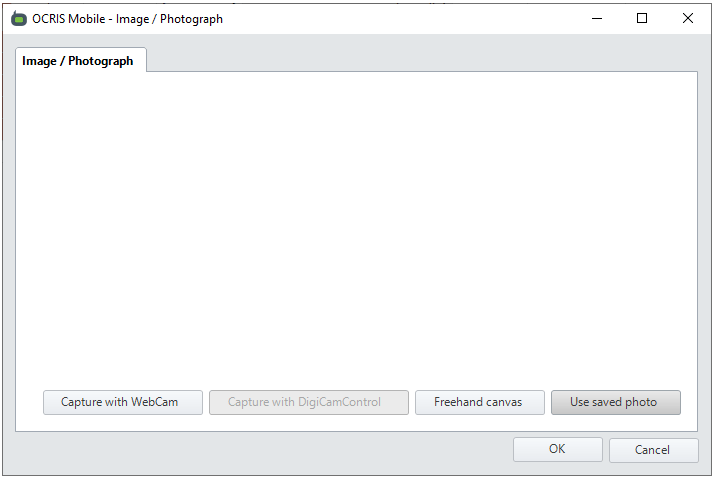
Select which camera you want to use or if you want to link to an existing image by clicking on the relevant button. Tap on the image to take a photograph. Click OK to commit the image file to the database.
It is possible to name the file as it is saved to disk. The name can be a combination of the Worksheet columns plus other characters. Your System Administrator will have set this up in the Logger file.
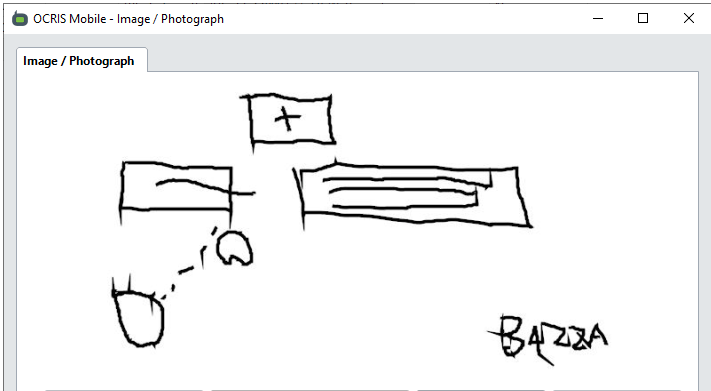
Freehand Canvas
With OCRIS Mobile it is possible to scribe a freehand drawing into the form and save as an image file. Examples of this use would be signing off on data or a quick diagram of a sampling site.
To initialise the Freehand Canvas click on the down arrow on the right side of the cell and click the Freehand Canvas button.
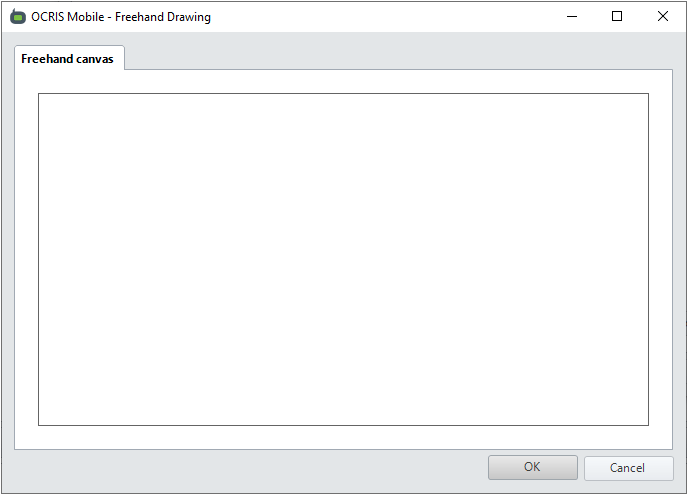
Use the mouse or touchscreen to scribe the drawing and, when complete, click OK to save the image to disk.
Scanned Codes
Within OCRIS Mobile it is possible to capture data from Bar or QR Codes. Examples are Sample bags with printed labels, Core Shed workstation ID, Core Tray ID. OCRIS Mobile supports using 3rd party connected scanners or the inbuilt Webcam on a computer.
3rd Party Connected Scanners
To utilise a USB or Bluetooth copnnected scanner place the cursor in the cell you want populated and press the button on the scanner device whilst pointing at the Bar or QR code. The corresponding data will be written into the cell.
The Scanner should be connected and visible in the Device Manager as a Barcode Scanner. Please check the scanner has been registered by Windows before attempting to scan codes.
Webcam Scanning
To utilise the builtin Webcam for scanning a Bar or QR Code click on the Scan QR Code button and select the Webcam from the list.

To capture the data hold the Webcam over the code and adjust the position until the code is read. Please note. this method of code scanning is not as reliable or fast as utilising a 3rd Party Connected Scanner.
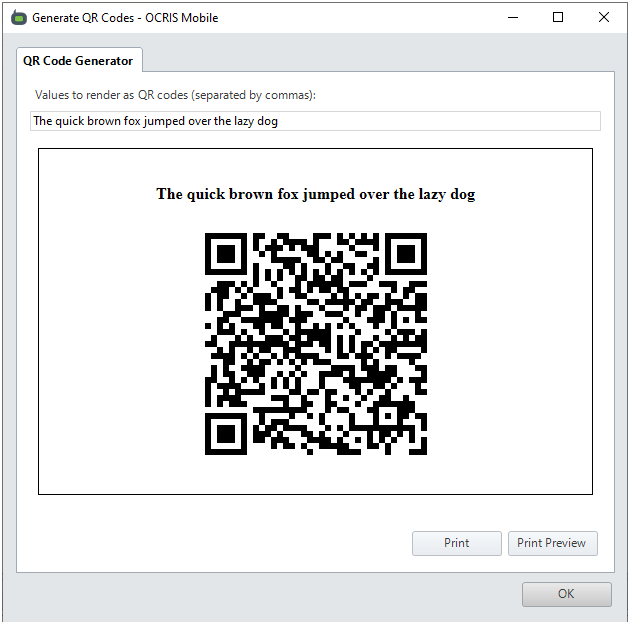
Generate QR Code
OCRIS Mobile supports the generation of QR codes, either from existing data or from manually entered data. QR codes are useful for marking Core Trays or to identify work stations in a logging facility.
To generate a QR code click in the cell with the data to convert and click on the Generate QR Code function  .
.
OCRIS Mobile will then display the resultant QR Code.
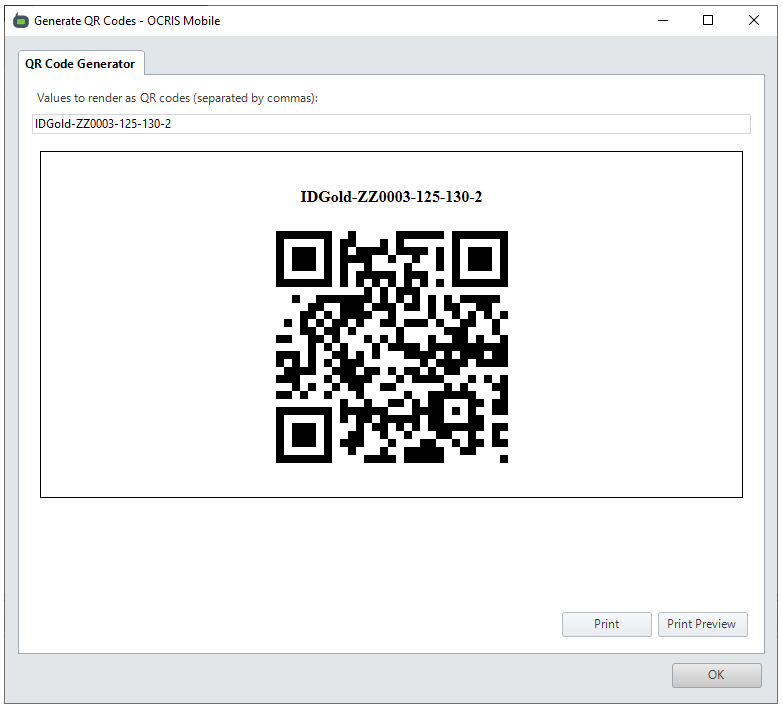
To the print the code to hardcopy click on the Print button and select appropriate settings from the printing form. To close the QR Code form, click OK.
Note it is possible to type in any string that requires a QR Code. Open the Generate QR Code form and type into the text box.
OCR Scanning
OCRIS Mobile supports a limited number of Optical Character Recognition (OCR) models such as that used on the Discoverer Series 4 core trays from https://www.dynamicsgex.com.au/ (opens in a new tab).
User Interface Adjustment
The way the OCRIS Mobile inteface looks and the order of Worksheets and columns within those worksheets is initially set up your System Administrator. This initial layout will be designed to follow the flow of work and all Worksheets are laid out in a single row. It is possible to alter this initial setup to suit personal preferences.
Worksheet Layout
To change to order of the Workshhets or to display two Worksheets side by side left click and hold on the Worksheet tab you want to move and drag it into the middle of the working area. A 4-sided location button will appear, drop the Worksheet on the quadrant you want it to appear relative to the other Worksheets.
Drop the Worksheet on the East quadrant and the worksheet will display to the right of the rest of the worksheets, see the example below.
This feature is particularly useful when entering related data into different Worksheets and seeing these data side by side.
If you need to move all the Worksheets back to the default locations click on the Reset layout button ![]() .
.
Column Order
To change the order columns appear within a Worksheet click on the Manage columns button ![]() .
.
With the Column Manager it is possible to hide, freeze or change the order of individual columns. Select the column to be altered and click on the required action.
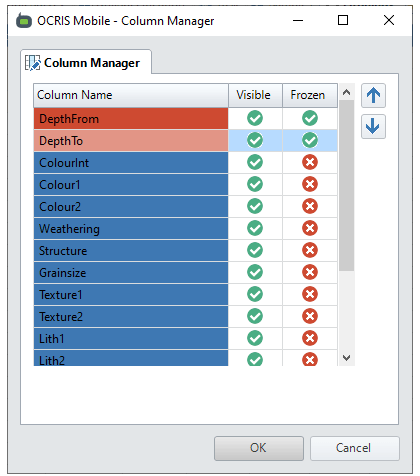
Freezing a column will ensure it is always visible on the left of the worksheet, typically used to fix the depth columns.
Hiding a column will do just that, make sure it is not a required column you are hiding as this will affect your ability to export data.
To change the order of columns, click on the column and move it left or right by hitting the Up or Down arrow respectively.
Data Validation
OCRIS Mobile supports multiple levels of data validation to ensure any data exported from the field will be ready for import into a database with no back and forth between remote personnel and the data manager.
Validation rules are created by the System Administrator when building the logging template and OCRIS Mobile runs all the rules as the data is being entered. Feedback to the User in the form of coloured cells and meaningful error messages is part of the interface and have been described earlier.
All rules are run in the background, but to run them again click on the Re-run rules button ![]() .
.
Sorting and Filtering
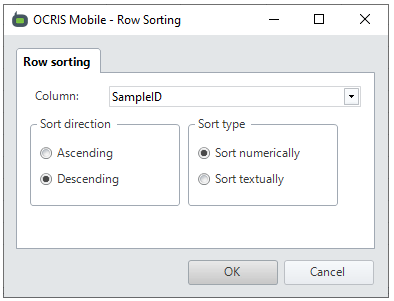
Sorting Row Order
OCRIS Mobile supports changing the default order data is displayed in the Worksheet. By default, data is ordered by ascending depth but this can be overridden if required. To change the order data is displayed click on the Sort rows button ![]() and define how you want the data displayed.
and define how you want the data displayed.
Chose the column to define the new sort order, chose if you want the order ascending or descending and chose if it is a text or numeric value you are sorting by. Click ok and the data will be re-ordered.
Filtering Data
OCRIS Mobile supports filtering data based on numeric or text values. To filter data in a worksheet click on the Filter rows button ![]() and define the required parameters.
and define the required parameters.
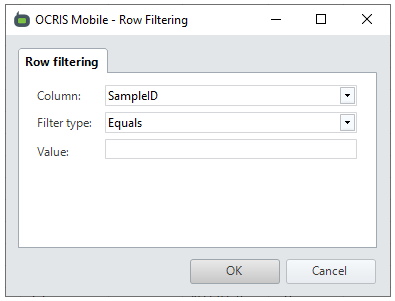
To filter the data, select the column to filter by, select the filter type, select the value and lastly select if the value to filter by is text or numeric. Click OK to display the filtered data.
Please note; it is possible to filter by a numeric value that is contained in a Text column. In this case change the Filter Case to numeric, otherwise leave it as default.
To drop the filter, click on the Clear filter button ![]() .
.
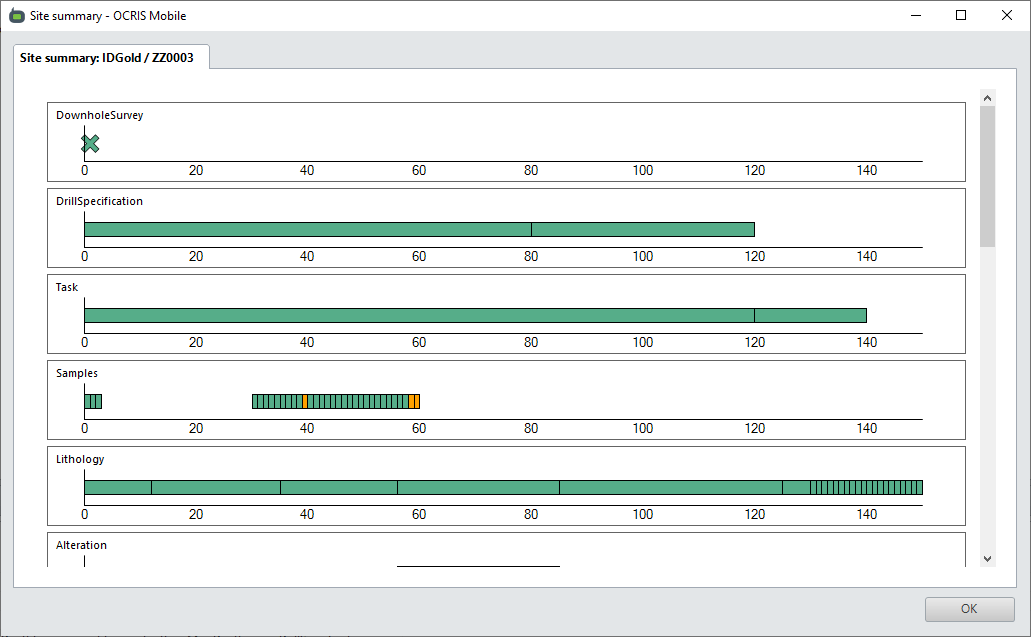
Graphical Display of Data
To see a graphical representation of what data has been entered for a site click on the Site Summary button on the ribbon  .
.
The Site Summary is designed to display depth based data and shows what has been entered relative to the maximum depth of any data in a drillhole. Interval based data is displayed as a green bar with the depth from and to end-points. Overlapping intervals are displayed as an orange bar. Any At Depth data will be displayed as a cross at the depth down the hole.