Importing data
OCRIS Mobile allows you to import existing data from external sources.
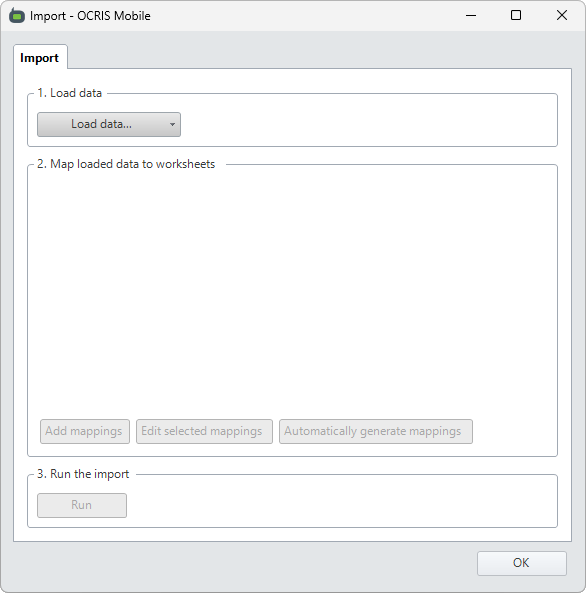
This functionality is available using the Import data function on the Importing / Exporting tab.
Import data source types
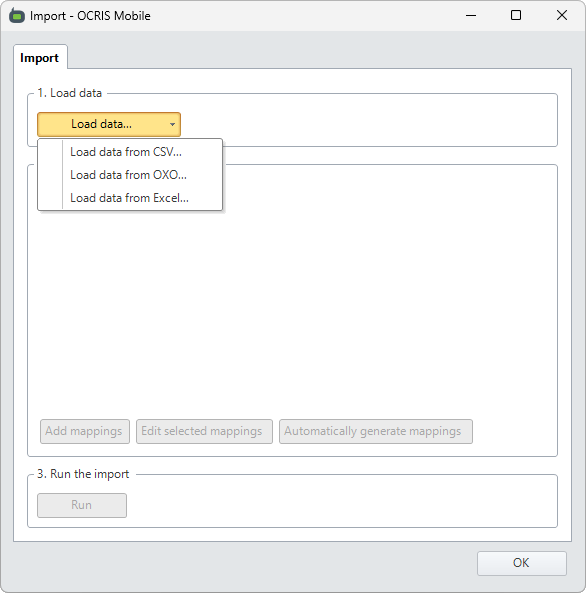
Data can be imported from the following data sources:
- A CSV file
- An OXO file
- An Excel file
To select the data source, click on the Load data... button and then select the desired option.
You will then be presented with file browser dialog, allowing you to select the file containing the data you wish to import.
Import data mapping
Once a data source has been selected, the next step is to map the tables from the data source to worksheets in the logger.
You have three buttons available:
- Add mappings - Allows you to manually configure the mappings for a single worksheet.
- Edit selected mappings - Allows you to edit the currently selected worksheet mappings.
- Automatically generate mappings - Automatically generates mappings for every worksheet that can be matched to the data in the data source. This is primarily used for OXO and Excel files, as they can contain multiple worksheets worth of data in a single file.
Adding mappings manually
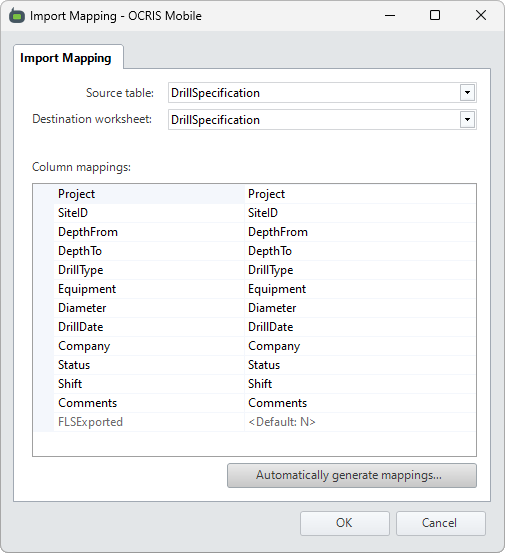
Clicking on the Add mappings or Edit selected mappings button will bring up the mapping editor.
First, you must select where to take the source data from (the 'source table' field) and where the data should be mapped to (the 'destination worksheet' field).
Once you have done that, you are shown a list of all columns in the worksheet, and you must choose what data should be inserted into each of them. Your options are as follows:
- One of the columns from the specified source data table.
- A default/constant value.
You should repeat this process for every table you wish to map. If the input file contains multiple tables (such as an Excel file with multiple sheets, or an OXO file with multiple worksheets), then you can map them all from within this interface. You can also map the same source table to multiple destination worksheets, if necessary.
Generating mappings automatically
If the table or column names are exact matches, you can use the Automatically generate mappings button to automatically map all matching tables and columns.
Running the import
Once all desired worksheets and columns have been mapped, your interface should look something like this:
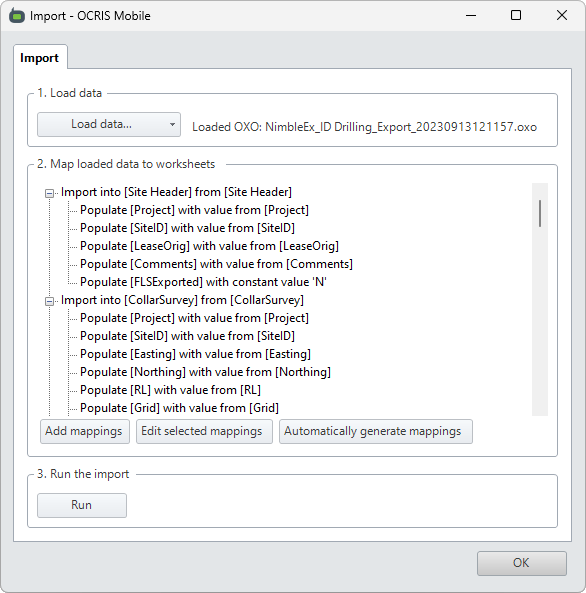
If you are happy with the mappings you have set up, you can run the import by pressing the Run button.
Once the import is complete, you will be shown a message indicating whether it was successful or whether anything went wrong.